What Is Included in a One Year Builder Warranty Inspection?
September 30, 2026

Quick Answer: A one year builder warranty inspection is a visual review of a newer home, done while the builder warranty is still active, that documents defects in workmanship, materials, and installation. Your inspector walks the roof and exterior, grading and drainage, foundation or crawlspace, attic, plumbing, electrical system, heating and cooling, interior finishes, windows and doors, appliances, and garage, then writes up what needs the builder's attention with photos and notes. It does not open walls, judge how long anything will last, or decide what your warranty covers. That decision belongs to the builder and your contract. The value is a dated, organized list you can hand to the builder before coverage ends.
The house is not quite two years old yet, and you are standing in the hallway on a Saturday morning with a coffee, looking at a hairline crack that has crept out from the corner of a bedroom doorframe. The back door has started to stick when it rains. There is a faint brown ring on the garage ceiling you are fairly sure was not there in the spring. None of it feels urgent, and all of it feels like something you should have written down. Your builder told you at closing to call if anything came up in the first year, but that promise was made a long time ago, and the list in your head is getting longer and fuzzier.
That is the exact moment a
one year warranty inspection is built for. Instead of chasing each small thing one phone call at a time, you bring in a trained set of eyes to go through the whole house in a single visit and turn your vague list into a clear report. This article explains what that visit actually includes, room by room and system by system, what it leaves out, and how to use the results once you have them. If you are a buyer in a newer subdivision, a homeowner close to the end of your first year, or an agent with a client who just moved into a new build, this is the walkthrough of what to expect.
What a One Year Warranty Inspection Is
A one year warranty inspection, often called an 11 month inspection because of when people schedule it, is a visual inspection of a home that is still under its builder warranty. The inspector checks the same major systems a standard home inspection covers, but the goal is different. A buyer inspection asks whether the house is sound enough to purchase. A warranty inspection asks what has shown up since the day you moved in that the builder may be responsible for looking at.
Builder warranties are commonly described in layers. A frequently used structure is about one year on workmanship and materials, about two years on major systems like plumbing, electrical, and heating and cooling, and a much longer period on structural defects. The exact terms, exclusions, and claim steps vary from one builder and one contract to the next, and your inspector does not interpret your warranty. What the inspector does is find and document conditions, so that you have something specific to bring to the conversation.
The Roof and Exterior
The inspection starts outside, because water is the most common source of trouble in a new home and the exterior is its first line of defense.
Roof Covering
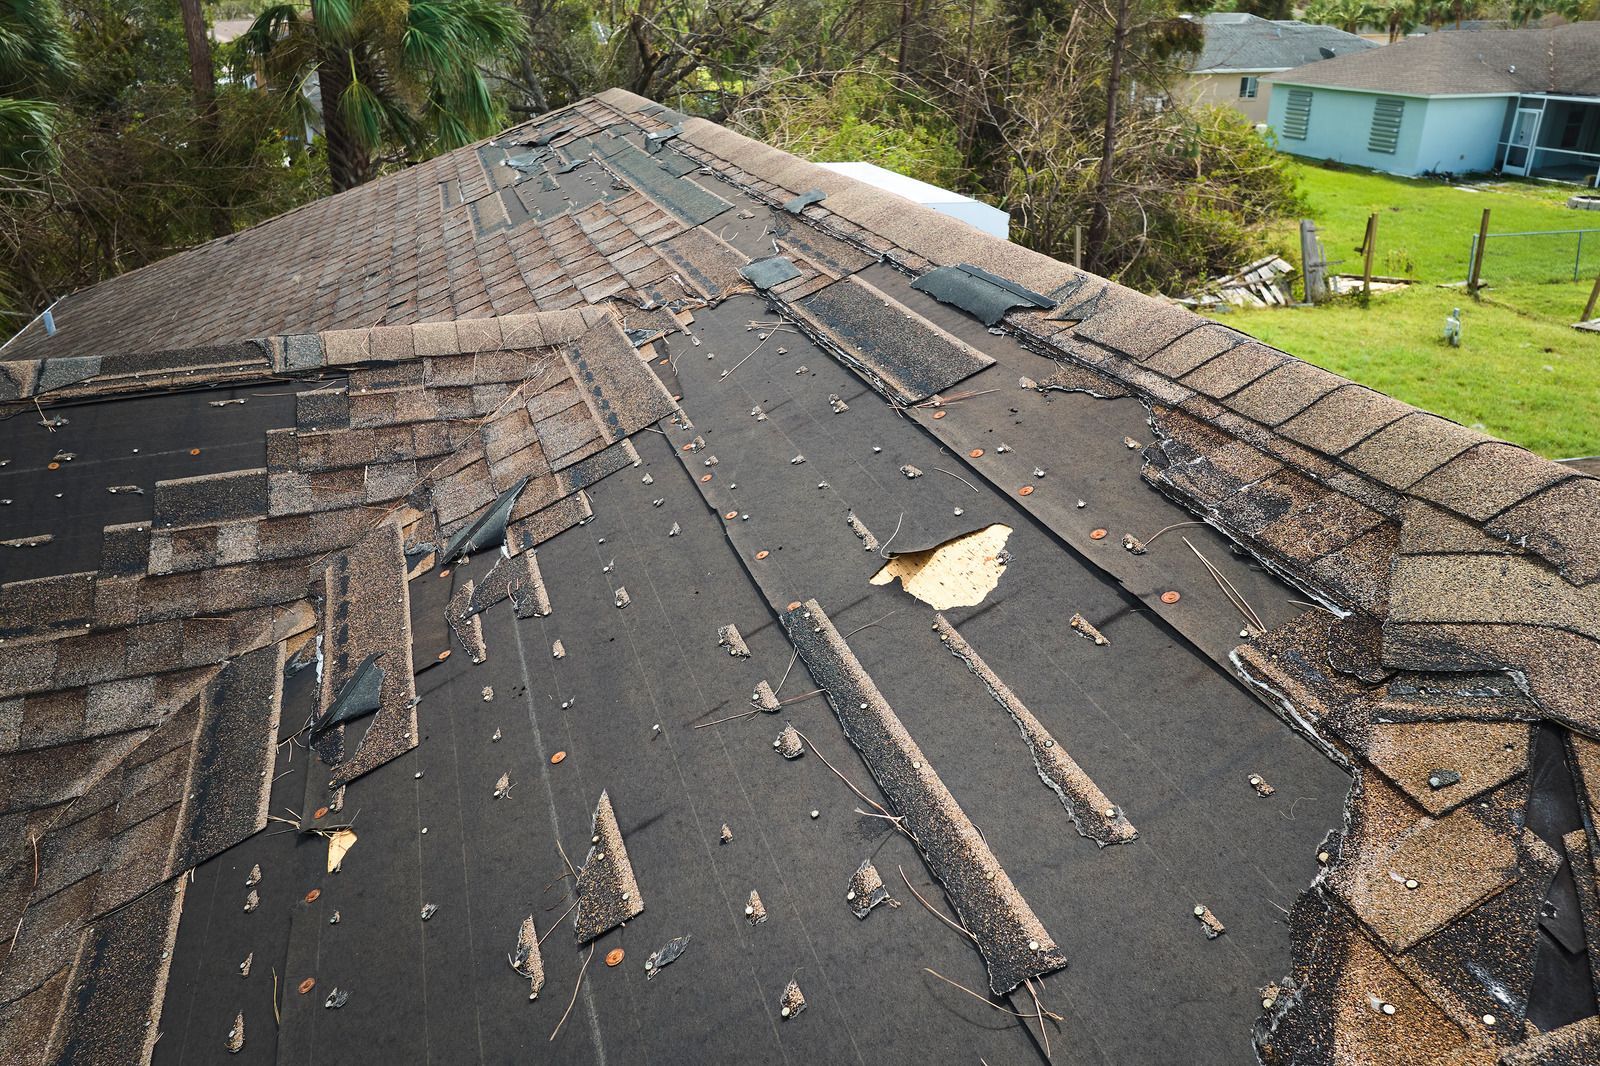
Your inspector looks at the shingles or other roofing material for lifted or slipped pieces, exposed or backed out nails, damaged flashing, and uneven installation. Roof flashing around chimneys, vents, skylights, and wall intersections is a frequent source of early leaks, so those spots get extra attention. Where the roof cannot be safely reached, the inspector notes the limits.
Gutters And Downspouts
Gutters should be attached securely, sloped to drain, and free of separated seams. Downspouts should carry water well away from the foundation. A downspout that dumps beside the slab is a small fix now and a bigger conversation later.
Siding, Trim, And Paint
Expect a check for gaps, cracked or separated joints, missing caulk, loose trim, and warped or swollen boards. In coastal Southeastern North Carolina, humidity and salt air are hard on exterior finishes, and sealant that looked fine at closing can open up at the joints within a year or two.
Grading and Drainage
Grading is one of the most overlooked items in a newer subdivision, and one of the most useful to catch in year one. The soil around a new foundation is backfilled and compacted by machines, then it settles over the following months. Low spots and flat areas appear where the ground once sloped away from the house.
A commonly cited guideline is that the ground should fall away from the foundation by roughly 6 inches over the first 10 feet, though site conditions and lot layout can change what is practical. Your inspector walks the perimeter looking for soil that has sunk toward the house, bare areas where water is washing out, mulch piled against siding, and places where water would pool after a storm. Water that collects beside a foundation is worth documenting, because it explains a great many later problems with moisture, cracking, and crawlspace humidity.
Foundation, Structure, and Crawlspace
The inspector looks at the visible portions of the foundation for cracks, movement, and signs of water entry. Some hairline cracking in a new concrete slab or block wall is common as the material cures, and a good report separates those from cracks that are wide, uneven, or offset on either side. Anything that looks like it may be structural is flagged for further evaluation by a qualified professional, not guessed at.
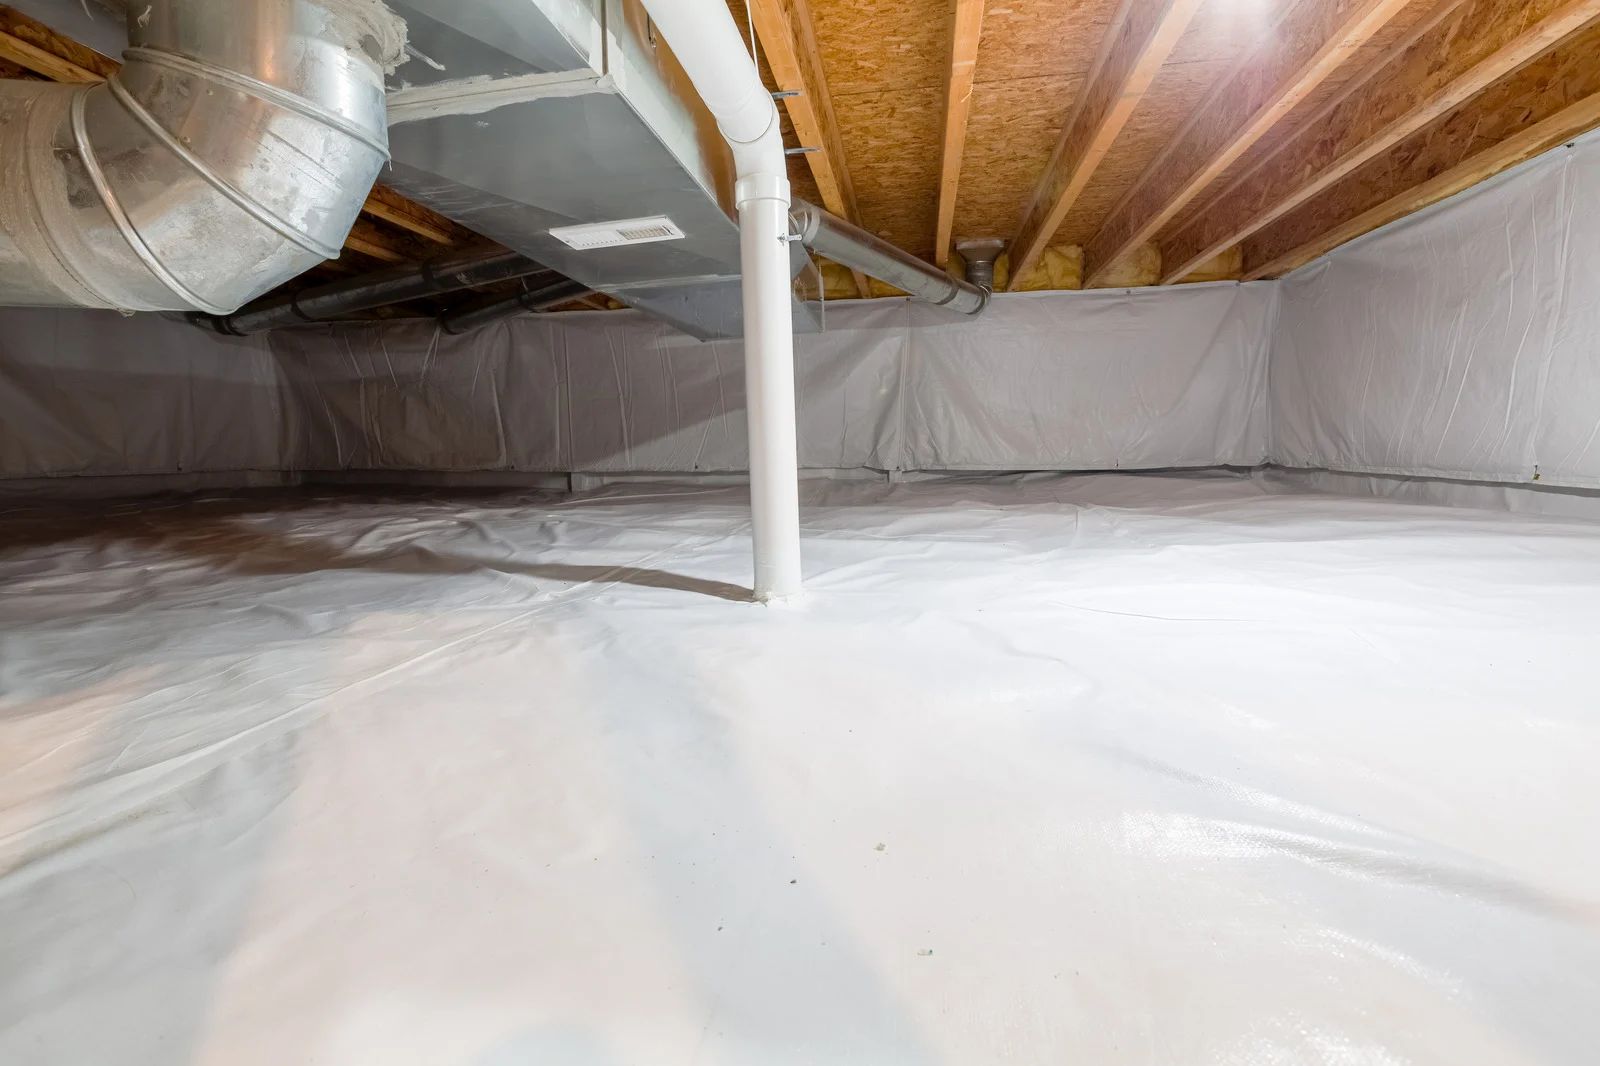
If your home sits on a crawlspace, that area gets its own attention. The inspector checks the vapor barrier, the condition of insulation, standing water or damp soil, any visible mold like growth or wood staining, pest activity signs, plumbing and ductwork supports, and whether vents and access doors are in good shape. Crawlspaces in our humid climate can change a lot in the first year, and a new one that looked clean and dry at closing can collect moisture once the seasons turn.
The Attic, Insulation, and Ventilation
The attic tells you a lot about how a house was built and how it is performing. Your inspector looks at insulation coverage and depth, whether it has been disturbed or is missing in places, ventilation at the soffits and ridge, bath fan and dryer duct terminations, and signs of roof leaks on the underside of the decking. Stains on sheathing, damp insulation, and ducts that have pulled apart or are crushed all show up here..
Plumbing
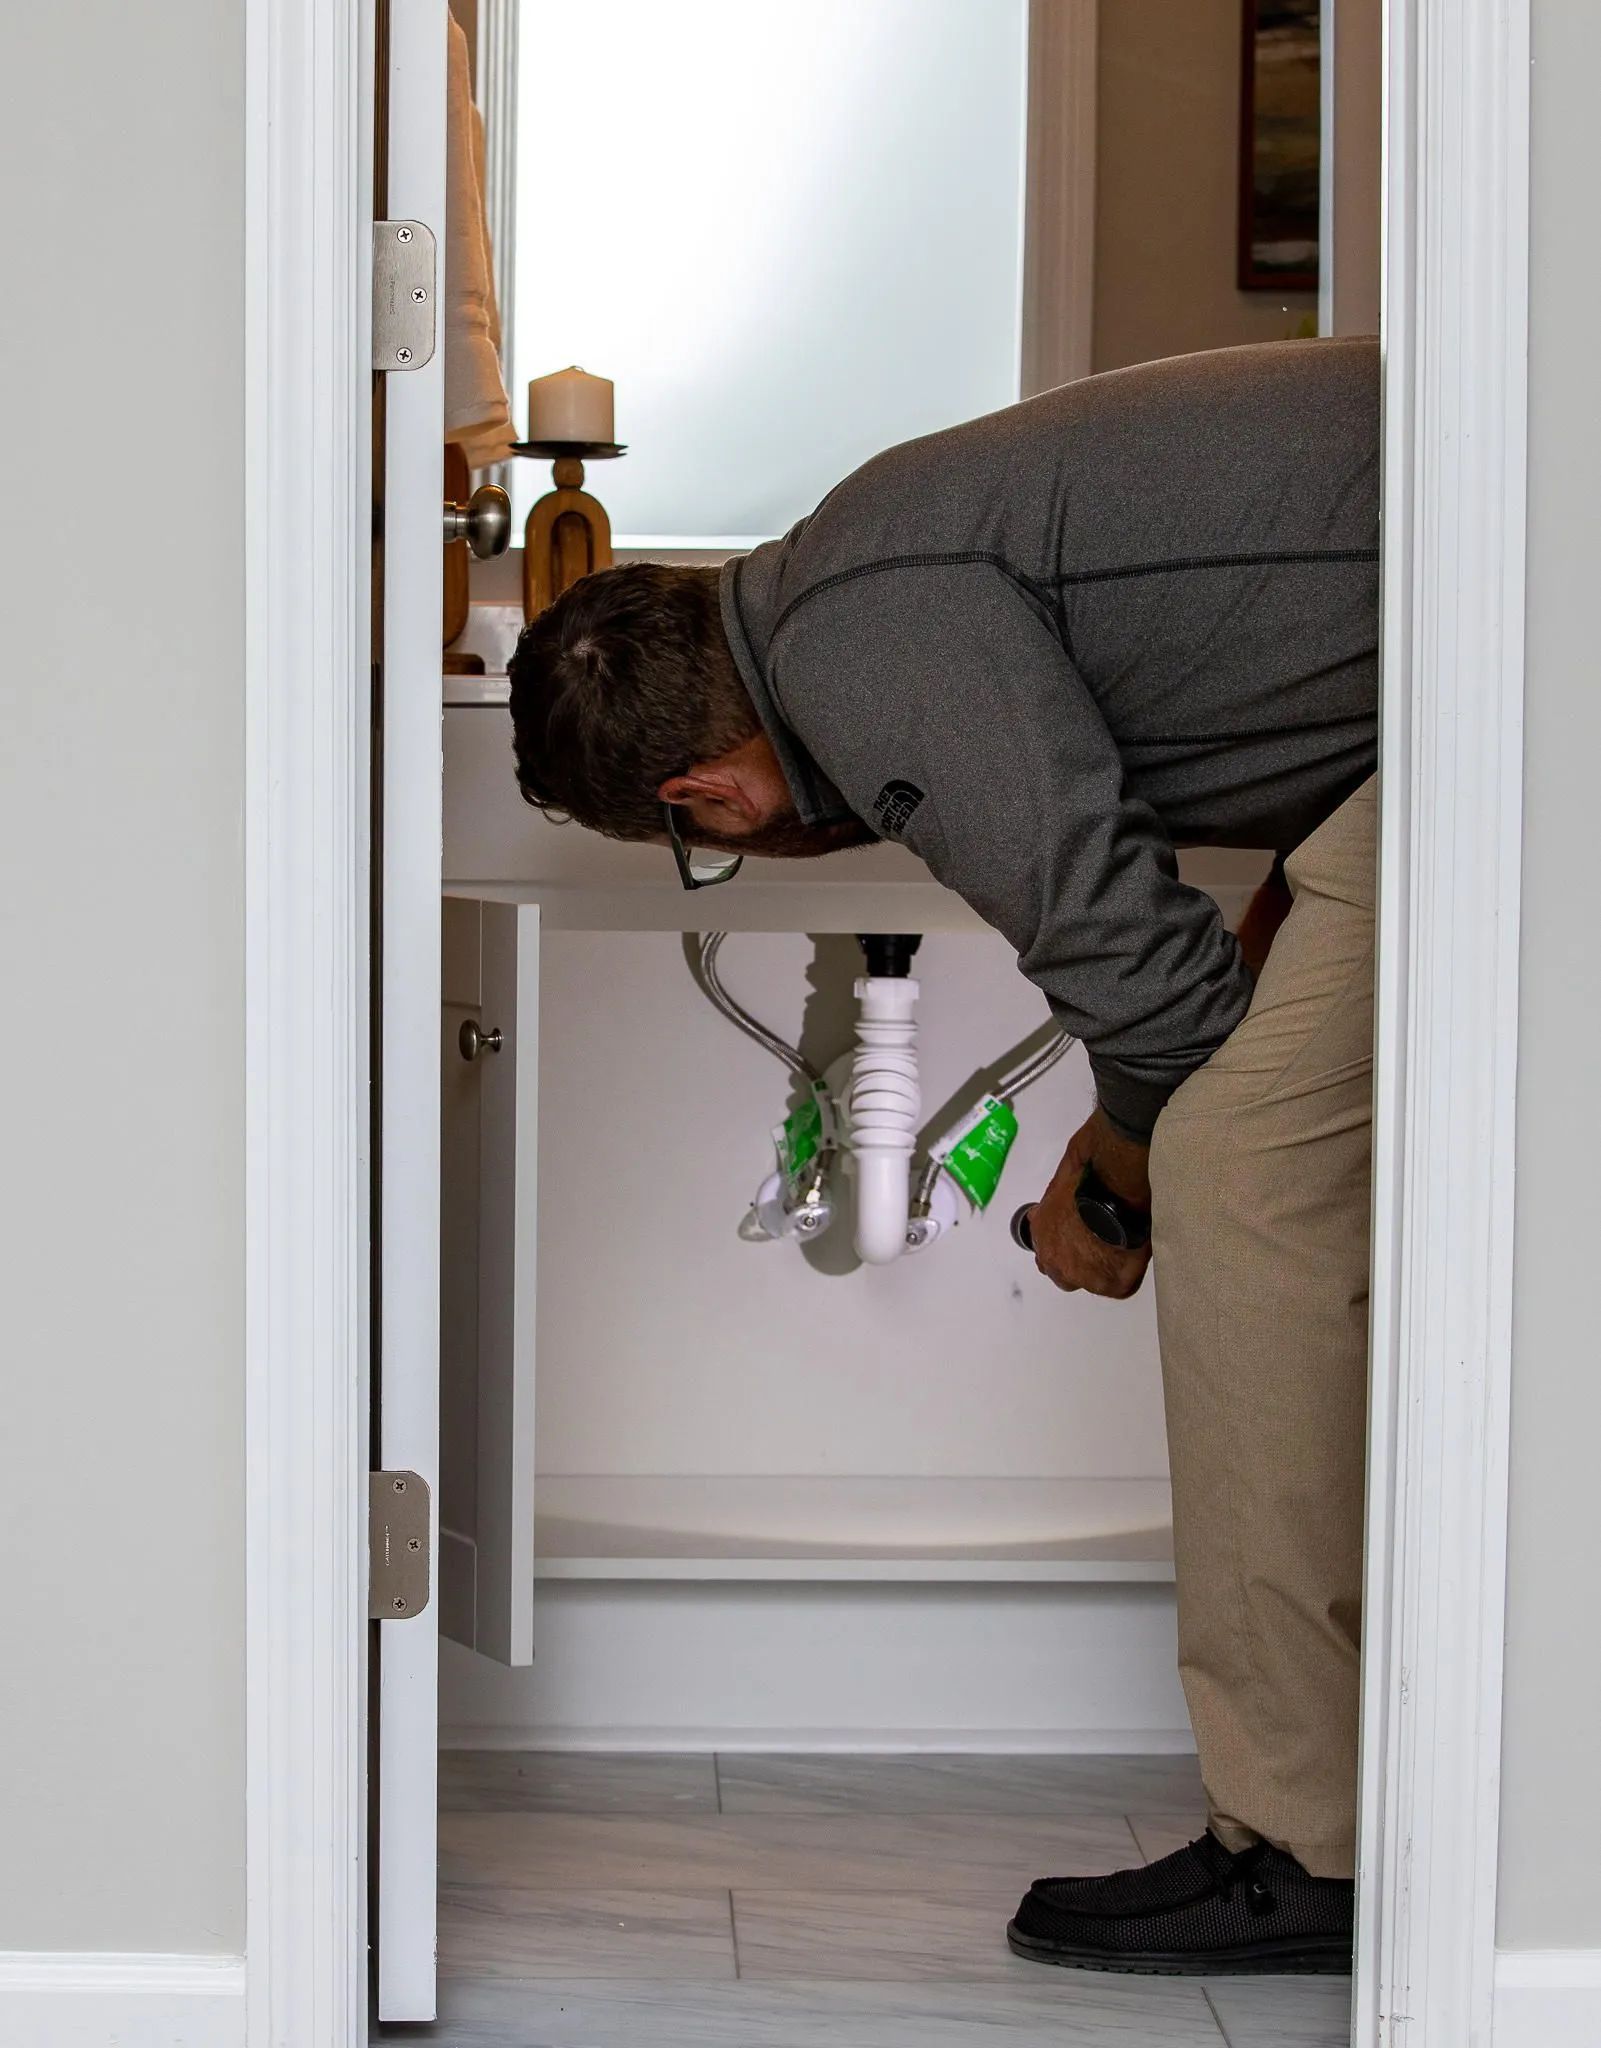
Your inspector checks the visible parts of the plumbing system by running water and looking closely.
Supply And Drain Lines
Visible pipes are checked for leaks, loose fittings, poor support, and corrosion. Water pressure and flow at fixtures are tested, and drains are checked for slow draining or gurgling.
Fixtures
Sinks, tubs, showers, toilets, and faucets are operated. Loose toilets, dripping valves, poorly sealed tubs, and cracked caulk around fixtures are common first year finds.
Water Heater
The inspector looks at the installation, venting, temperature and pressure relief piping, and any sign of leaking or rust at the connections.
Electrical
Electrical findings are some of the most important in a warranty inspection, because they can relate to safety and because an installation mistake behind a panel cover is not something you would ever spot on your own.
The inspector removes the panel cover where it is safe to do so and looks at the wiring, breakers, labeling, grounding and bonding, and any signs of overheating or loose connections. A sample of outlets and switches is tested for correct wiring and operation. Ground fault and arc fault protection is checked where it is present, as are smoke and carbon monoxide alarms.
Warning: If you notice a burning smell, a warm or buzzing outlet or panel, sparks, or a breaker that trips again and again, do not wait for an inspection. Stop using that circuit and call a licensed electrician right away. A warranty inspection documents conditions for the builder. It is not an emergency service.
Heating and Cooling
Your inspector operates the heating and cooling system and looks at how it is installed and how it performs. The outdoor unit is checked for level placement, refrigerant line insulation, and clearance. Inside, the air handler, filter, condensate drain line, and duct connections are reviewed. The inspector looks at supply and return temperatures at the registers, which gives a rough picture of whether the system is cooling or heating as expected, and checks the thermostat operation.
In our humid region, the condensate drain line and duct insulation deserve a close look. A clogged drain or an uninsulated duct in a hot attic can lead to water stains on ceilings and higher humidity indoors. Because major systems are commonly covered for a longer period than general workmanship, your inspector will often note the condition of these systems even when everything seems to be running normally.
Interior Finishes, Doors, and Windows
This is the part of the report where most of the list tends to come from, because it covers the things you see and touch every day.
Walls and ceilings. Expect notes on drywall cracks, nail pops, tape seams that have shown through the paint, and stains on ceilings. A small amount of cosmetic settling cracking is common in a first year. Stains, bubbling paint, and cracks that keep widening suggest something more than cosmetic.
Doors and windows. Interior doors are checked for rubbing, sticking, and latching, and exterior doors for weatherstripping and sealing. Windows are operated and checked for broken seals, fogging between panes, failed caulk, and proper locks. A door that sticks in damp weather may be a minor adjustment or a sign that something has moved.
Kitchen, Laundry, and Garage
Built in appliances are operated to confirm they work as intended, including the range, oven, dishwasher, disposal, and microwave when present. Bath and kitchen exhaust fans are checked for airflow and proper venting.
In the garage, the inspector tests the overhead door, its auto reverse safety feature, and the opener, and looks at the fire rated door and any firewall between the garage and living space for gaps or damage. Floor cracks, slab drainage, and wall and ceiling condition are noted as well.
TIP: Before the inspector arrives, walk the house once with your phone and take a short video, narrating anything you have noticed. Note which doors stick, which rooms feel humid, and where you have seen a stain. You will get more out of the visit, and your notes help the inspector check the spots you already care about.
What a Warranty Inspection Does Not Include
It helps to know the limits before the report arrives, so your expectations match what the visit can do.
A warranty inspection is visual and does not open walls, dig up buried lines, or take apart equipment. It reports on conditions that could be seen and safely reached on the day of the visit. It does not predict how long a system will last. It is not a guarantee that nothing else will go wrong. It does not decide which items your warranty covers, since that depends on your builder's terms and your contract. Many builder warranties exclude normal wear, routine maintenance, weather damage, and purely cosmetic preferences, so some items in your report may land in the category of homeowner maintenance and not builder responsibility.
Specialty tests such as radon, mold sampling, and well water or septic evaluation are separate services and not part of a standard walkthrough of this kind. If a finding suggests one of them would help, your inspector will say so and point you toward the right specialist.
How to Use the Findings With Your Builder
The report is only useful if it reaches the right person in a form they can act on. A few habits make a real difference.
Sort The List First
Review the inspection report and group findings into safety issues, active moisture concerns, system performance problems, and cosmetic items. Address safety and moisture first.
Send It In Writing With Photos
Submit warranty requests through the builder's written process, including photos and specific locations. Keep copies of everything submitted and record the submission date for reference.
Be Specific And Calm
Describe what you observed, where it occurs, and when you noticed it. Specific details make warranty issues easier to understand, document, and address.
Submit Before Your Coverage Ends
Check your contract for warranty periods and submission deadlines. Submit requests before coverage expires, leaving enough time for processing, follow-up questions, and scheduling necessary repairs.
Frequently Asked Questions
Is a one year warranty inspection the same as the inspection I had before closing?
No. They cover many of the same systems, but a pre closing inspection asks whether the house is ready to buy, while a warranty inspection documents what has appeared after a year of living there.
Does the inspector check everything the builder is responsible for?
It documents visible conditions across the house. Whether an item is covered depends on your builder's warranty terms and contract, so the report is a starting point for that conversation, not a ruling on coverage.
Should I be home during the inspection?
It is a good idea. Being there lets you point out what you have noticed and see conditions in person, like a loose attic duct or settled grade, so the report makes much more sense.
Can a house in a newer subdivision really have problems after only one year?
Yes. New homes go through their first cycle of seasons, and settling, drying, and small installation errors commonly appear. Most findings are minor, and a few are the kind you are glad to catch early.
What if the report finds very little?
That is a good result. A clean report gives you a dated record of the home's condition at the end of year one, which is worth keeping in your files for any future warranty conversations.
A Clear Record Keeps Your New Home Protected
Brad Inspects
serves Jacksonville, NC, with 10years of experience evaluating homes and identifying conditions that may affect their safety, comfort, and long-term condition. A careful crawlspace assessment can reveal problems that are difficult to spot from the access opening, including elevated wood moisture, damaged vapor barriers, insulation concerns, and evidence of previous water intrusion. Understanding these findings gives homeowners, buyers, and sellers the information they need to make informed decisions about the property.